HoloLens is an additive display. It can only add light to the real world and not block light to make the world look darker. This means that if you show an image with a black and white gradient the black part will be transparent and the white part will be opaque. Alpha (transparency) does not matter for blending with the real world. However alpha does play a role when blending with other 3D content that is rendered behind the image.
When recording a photo or video the on-board colour camera is used to capture the outside world. This is blended with the rendered scene and this typically results in a different result than what the user actually sees on the device.
The all encompassing alpha blending experiment
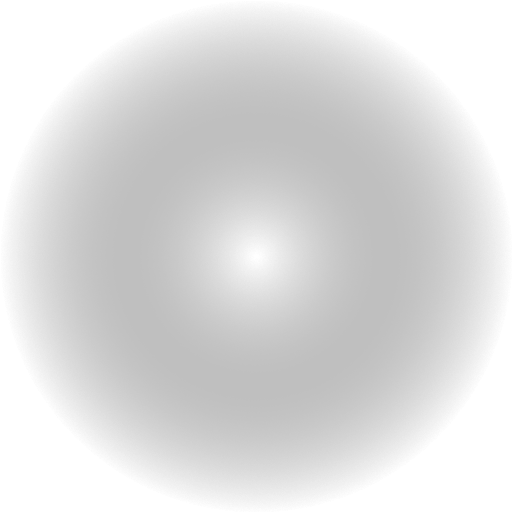
First I created 4 textures to show on a quad. All textures have an alpha of 1 (opaque) in the center and 0 (fully transparent) on the outside. The differences are in the RGB colors of these textures:
- white center to white outside
- white center to black outside
- black center to white outside
- black center to black outside
The images I used on a blue background for contrast:
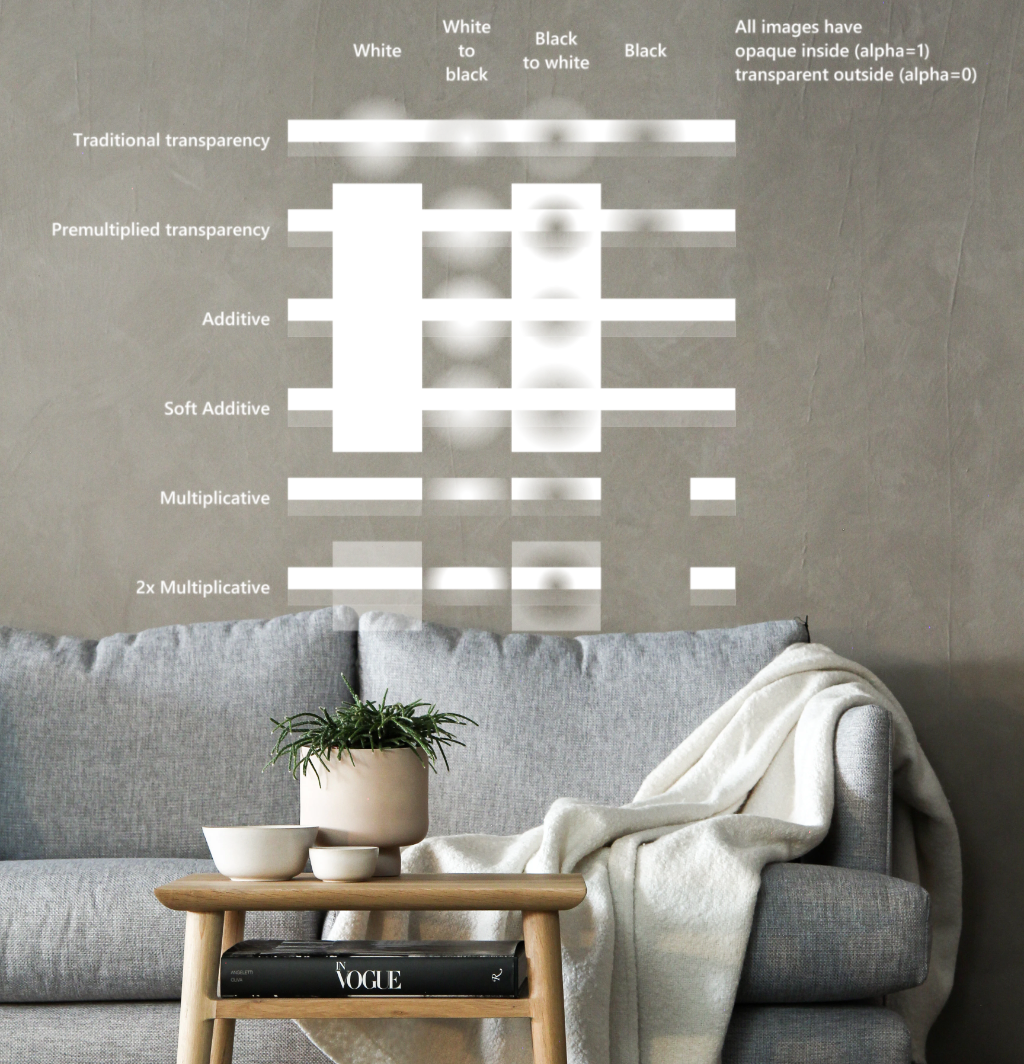
 |  |  |  |
Unity scene
I setup a simple test scene with a number of quads with these different textures and blend modes. The rows in this scene show the common shader blend modes. The stretched box behind each row is there to show the difference between blending the real world (where the dark gray background is in Unity).
Here’s what it looks like in Unity:

The common shader blend modes that I keep needing to lookup:
Blend SrcAlpha OneMinusSrcAlpha // Traditional transparency
Blend One OneMinusSrcAlpha // Premultiplied transparency
Blend One One // Additive
Blend OneMinusDstColor One // Soft additive
Blend DstColor Zero // Multiplicative
Blend DstColor SrcColor // 2x multiplicative
In HoloLens simulation
Rendering this scene on HoloLens will make all black parts invisible because light can only be added. It’s almost impossible to capture this with a camera through the actual device. So I created a composition to show a simulation of what it looks like in the HoloLens. Basically an additive blend with the background image.
HoloLens PhotoVideo camera capture
The HoloLens has a colour camera in the middle above the eyes to capture photos and videos. The resulting photos and videos are a composition of what the colour camera captured and a image of the rendered scene. It’s important to know that this composition uses the alpha value that is rendered in the scene instead of doing an additive blend like I did in the composition above. This will make the outcome a bit different in some cases.
Here’s what it looks like when this scene is captured on HoloLens:

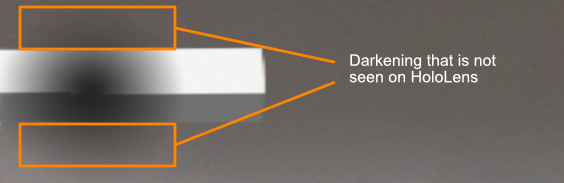
However this is not what the user sees. When you look at the fourth column you can clearly see a few parts where there is black shown on top of the real world. That is impossible on the actual device (as seen in the simulation).
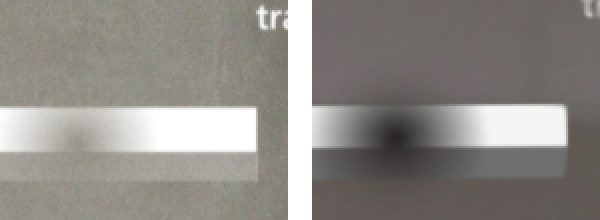
Another noticeable difference is that between the white image with traditional transparency and the white to black image with premultiplied transparency blending. In Unity and on HoloLens these images look similar, but on the captured image they look different. There’s a black halo around the image. This tells me that for HoloLens capture purposes it is better to use traditional transparency.

Rendering black: a matter of perception
Although technically an additive light display cannot render black it is possible to perceive darkening. When a dark part is rendered in front of a lighter area the user will perceive this as a darker colour. In practice this is highly dependent on the brightness of the HoloLens display, the brightness of the environment and the amount of lighter surroundings in the 3D scene.
When you look at the top right quads in the photos above you see that the simulation (left) shows the background and the captured image (right) shows a black colour on top of the background bar. In practice the perceived effect will be a mix of these two images.
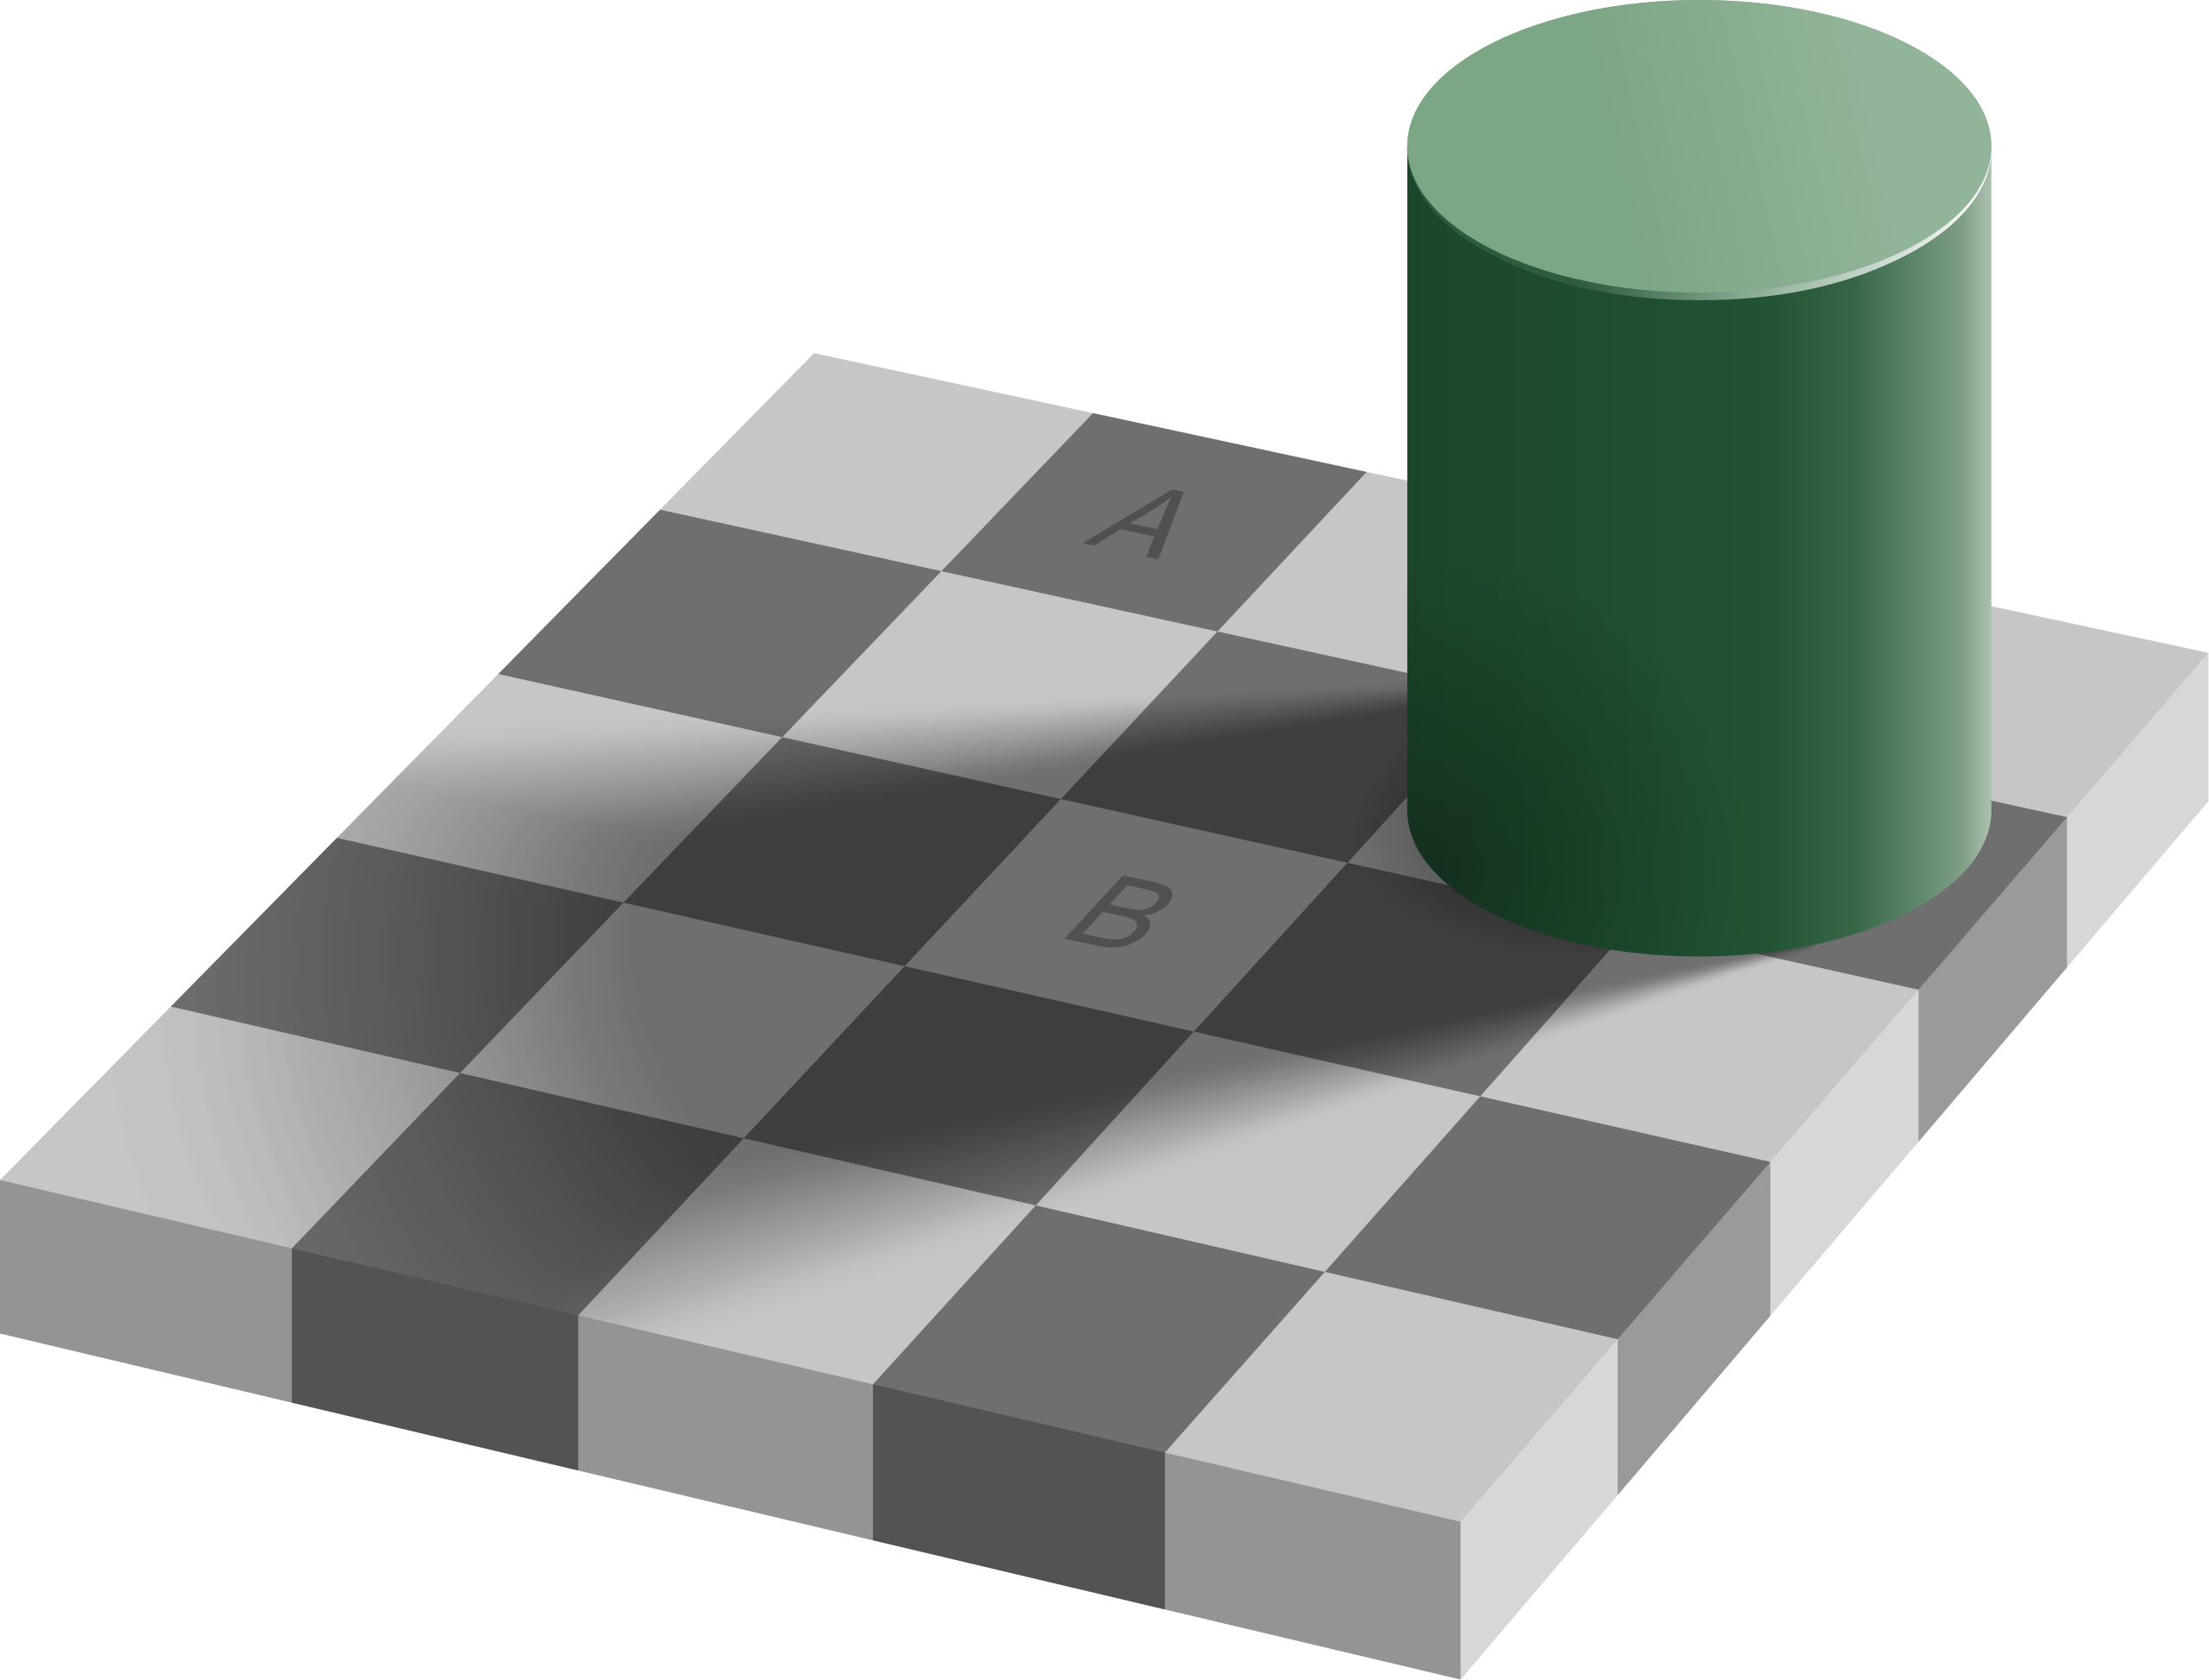
This effect of visual perception is demonstrated in this well known Checker shadow illusion by Edward Adelson. Tiles A and B in this image have the exact same colour, but the perceived colours differ because of it’s surrounding.
On HoloLens this can be used to create parts that are perceived as almost black by surrounding it with a lighter area. For instance black text with a light background plane will be visible, but a black text alone will not. This will work best if you use it in a dimmed environment and when the brightness of the HoloLens is set to its highest.
Leave a Reply
You must be logged in to post a comment.