I ran into a two weekly Techart challenge by Harry Alisavakis with the theme Watercolors. I decided to participate and use Shader Graph in Unity for doing some soap bubble rendering.
Reflections & Iridescence
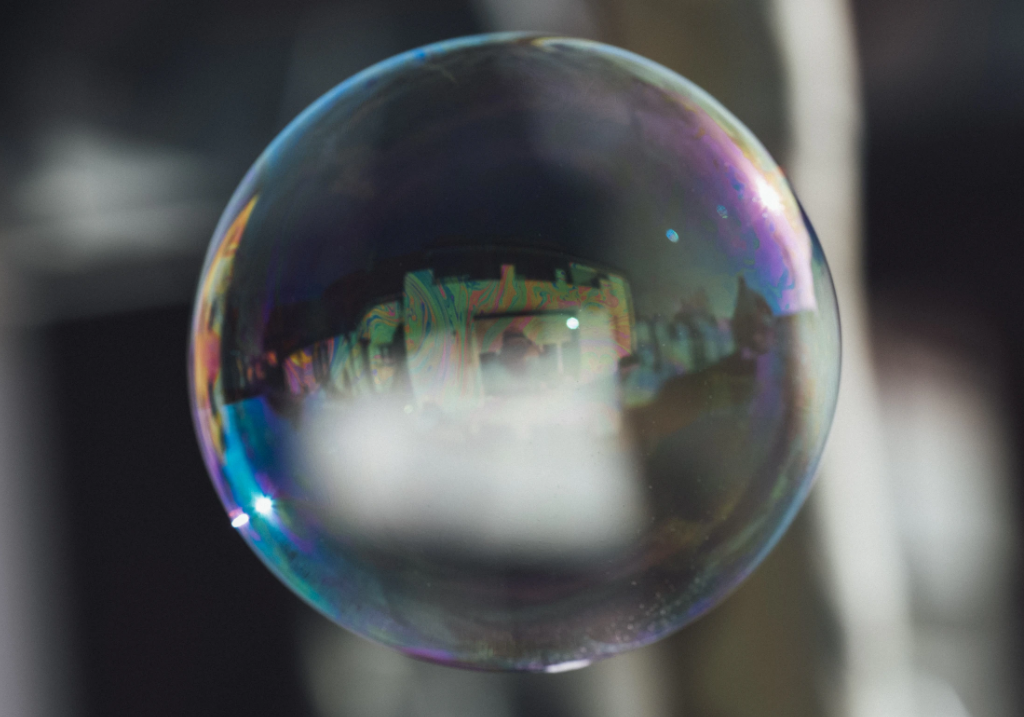
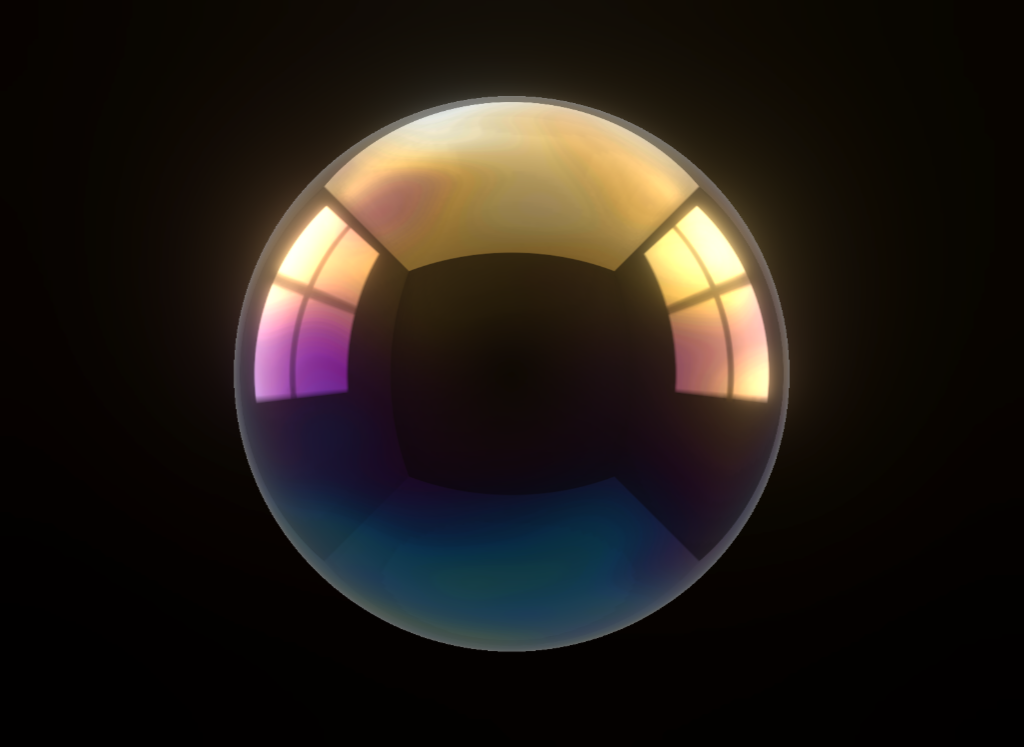
The most visible features of a soap bubble are its reflections and its rainbow like colours. You can see reflections from both the front and back side of the bubble surface. This results in a mirrored reflection of the environment of the bubble.
The colours are caused by interference of the light that is reflected from the outside and the inside of the thin bubble surface. This phenomenon is called iridescence and it can also be found in sea shells, butterflies, insects, but you may also know it from the surface of a CD. When you inspect the bubble surface closely you can see a complex pattern of dancing colours. This is caused by variations in the bubble surface thickness due to complex fluid interactions that are known as the Marangoni effect.
Reflections in Shader Graph
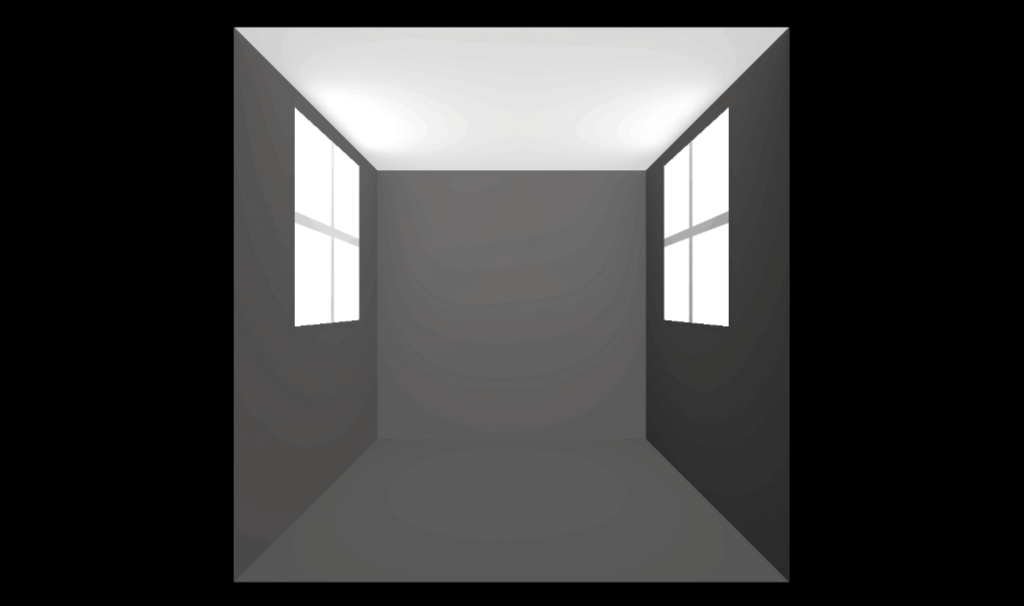
For the reflections I created a simple room with with two fake windows. A reflection probe was used to bake it into a cubemap. Alternatively you could also use a HDRI image captured in real-life.
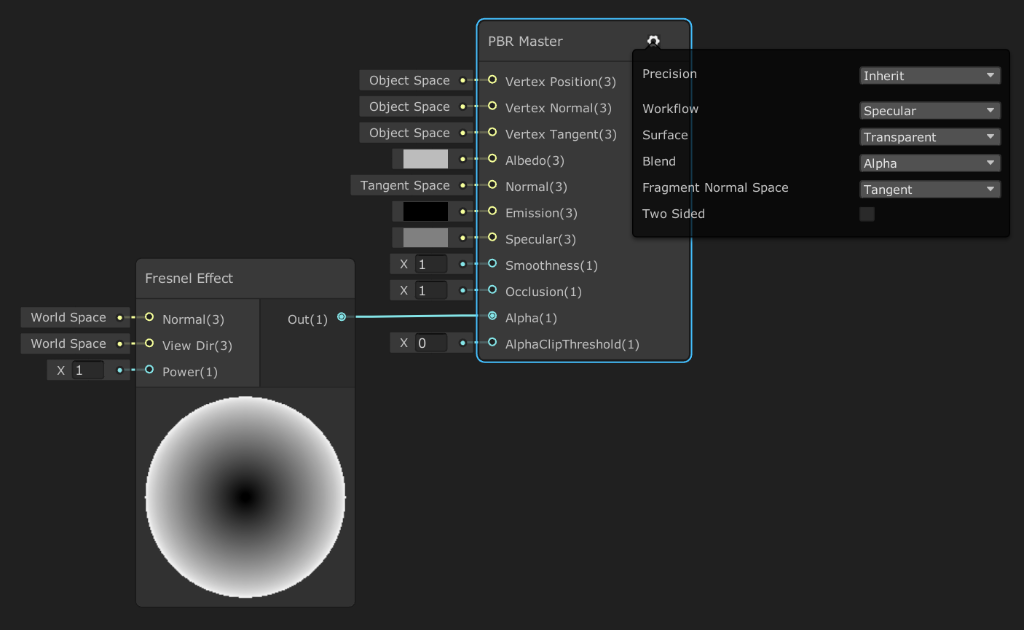
A basic PBR graph with the Workflow set to Specular, Surface to Transparent and a Smoothness of 1 will already give you a nice reflective material. Add in a bit of Fresnel effect so the reflections are mostly noticeable on the outside and here’s the result.

Iridescence in Shader Graph
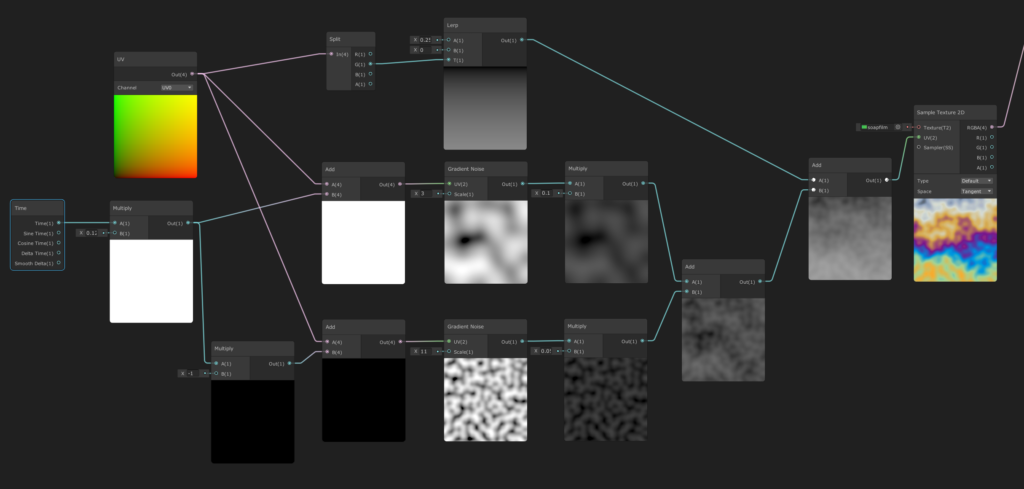
I took a more artistic approach for the simulation of the bubble surface variations by blending two layers of scrolling noise. This misses the swirls that you typically see in a real bubbles, but this won’t be noticeable at a distance. I added a vertical falloff to simulate that the thickness of a bubble is a bit larger at the bottom of the bubble. The surface thickness variations result an animated grayscale value. A gradient lookup gradient is then used to determine the iridescence colour. The gradient is based on a paper by Andrew Glassner.
Double sided materials
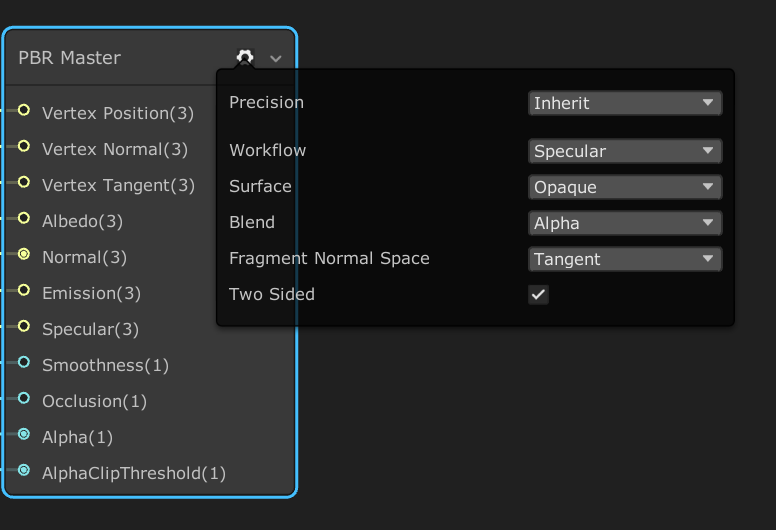
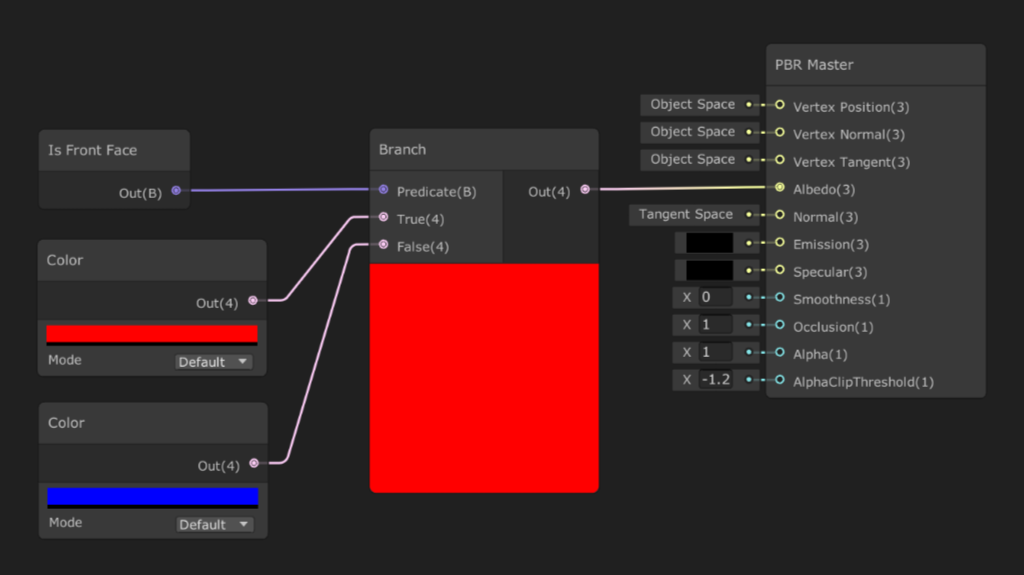
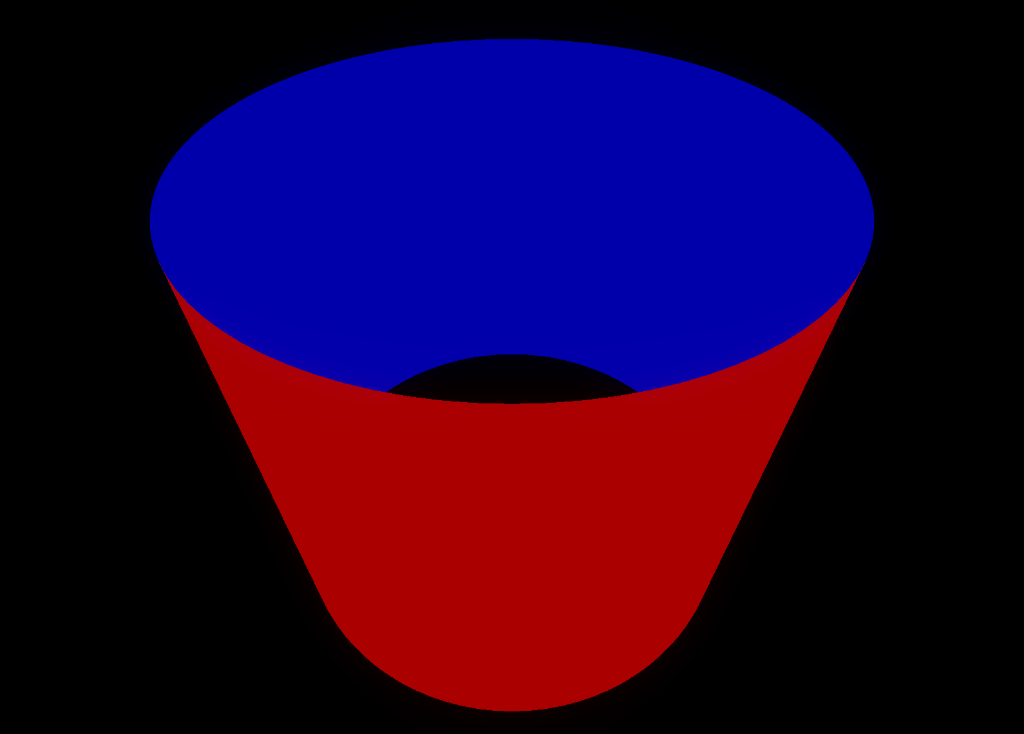
To create a double-sided material with different handling of forward and backward facing materials you can use the IsFrontFace node and branch into different parts of the shader based on the value. This works well with opaque materials and can be done in a single pass. Below you see a simple example that displays the result on an open cylinder.
Double sided transparency
With transparent materials we typically want to do a separate backface pass and frontface pass to at least have a coarse way of sorting the model surfaces. That is easy to do in a ShaderLab (hand-coded) shader, but a bit harder when using Shader Graph.
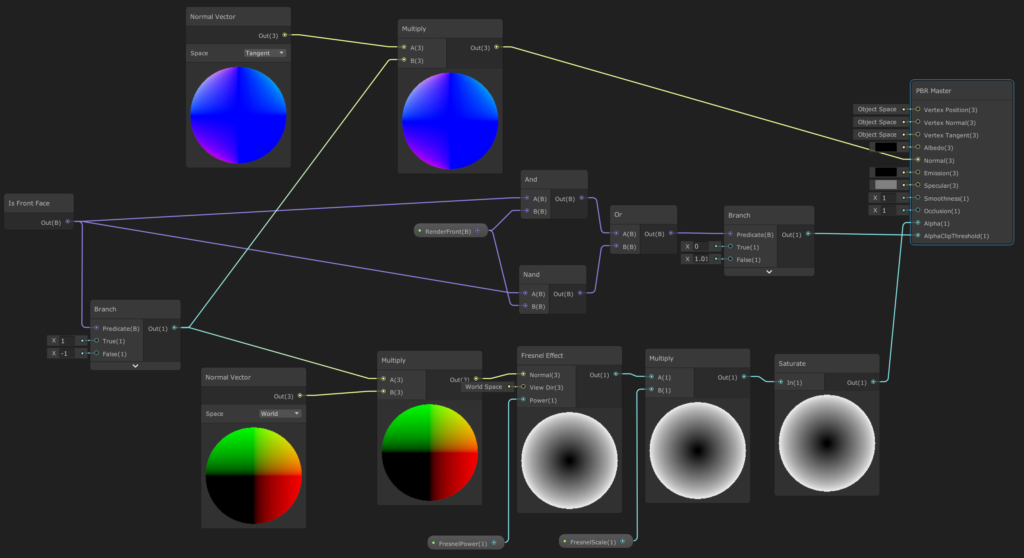
Since the Universal Rendering Pipeline (URP) only supports one pass materials by default we need to come up with a different trick. We could create a copy of the mesh and render that with a separate material for the backside, but that would mess up the scene tree. And it would even become worse if the geometry were dynamic. Instead I chose to add a second material that uses the same Shader Graph shader but with a RenderFront flag to enable the front or backface rendering.
Note that Unity shows a warning and advises the use of multiple shader passes, which are not supported when using URP. 🤷♂️

The Shader Graph is using the RenderFront flag combined with the IsFrontFace node to determine if the front or backface needs to be rendered. I used AlphaClipping the prevent rendering of the backface when frontface rendering is active. Note that for backface rendering the surface normal needs to be flipped.

Leave a Reply
You must be logged in to post a comment.