Category: Unity

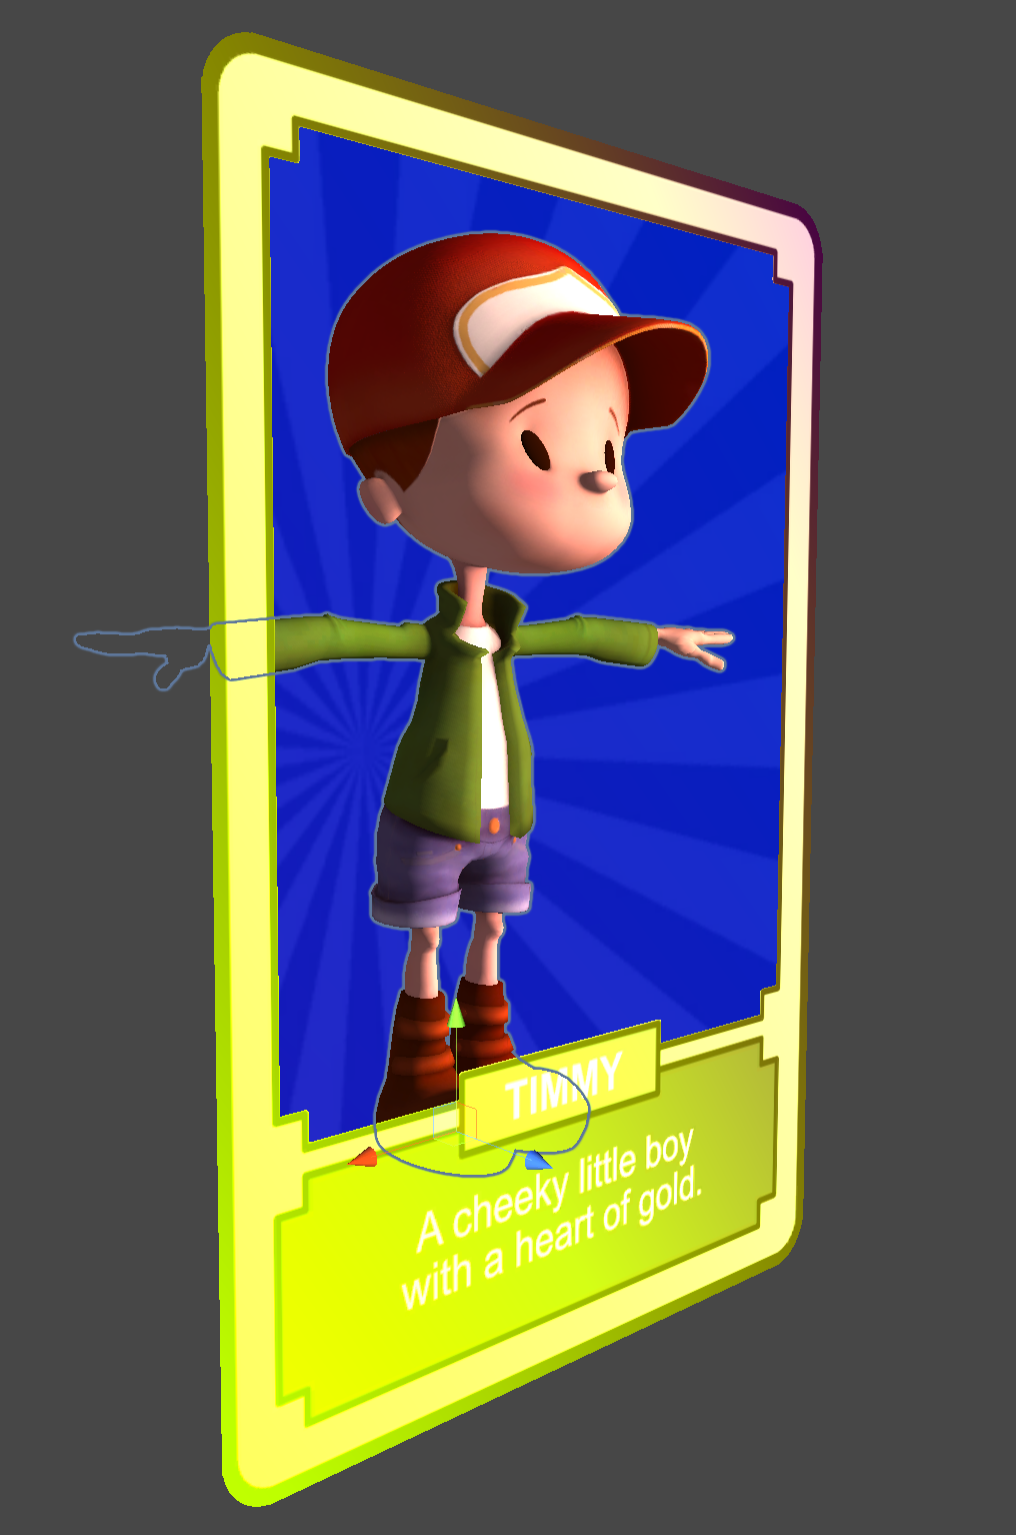
Building a holographic card with the MRTK Standard Shader

Another blog post based on one of the TechArt challenges by Harry Alisavakis. This time the theme was Trading card foil. The challenge was a perfect opportunity to work with the MRTK Standard Shader that is part of the Mixed Reality ToolKit. The MRTK Standard Shader is a shader that is optimized for use in Mixed Reality applications. It is a so called übershader that contains many options that can be enabled when needed. Besides regular lighting it also contains options to add a stencil portal and iridescence.

In this blog post I will go into the three pieces that I used to construct the card shown above:

  • The portal effect that masks out the character and his background
  • The rainbow colors that run across the card and depend on viewing angle (not in the video recording due to a bug)
  • The character pose controlled by viewing angle

The hand interaction is based on the commonly used ObjectManipulator that is part of the MRTK.

Portal Stencil mask

A portal card can easily be achieved with the MRTK Standard Shader when you know what to look for. Here’s the scene setup for the portal card. The top level Card object contains the ObjectManipulator, a BoxCollider, and a NearInteractionGabbable components to make it manipulable on HoloLens.

Without stencil masking the scene looks like the screenshot below. Visible are the PortalBackground, the Timmy character model and FrontSide of the card.

To create a stencil portal the following parts are needed:

Stencil mask producer: The StencilPortal object is a quad that generates a stencil mask. This stencil mask will then be used to determine which pixels should be end up on screen. It is important to note that the stencil mask should be rendered before any object that needs it. Therefore the Render Queue of the StencilPortal material is set to 1999 so it renders before the regular geometry. Furthermore you can see that each rendered pixel of the StencilPortal will fill the mask with values 1 (Read: Always Replace with 1). It is possible to generate different masks with different values. Note that the StencilPortal object is not rendering visible pixels to the screen, but is only used to fill the stencil mask.

Stencil Mask Producer Material

Stencil mask consumer: The PortalBackground and Timmy materials are also using the MRTK Standard Shader, but they have their Stencil setting set to the values below. Basically the shader is told to Keep a pixel when the stencil mask contains a value Equal to 1 and ignore all other pixels of the object.

Stencil Mask Consumer Material

After adjusting the stencil setting this will result in the image below. Note that the FrontSide of the card is disabled in this sceenshot to clearly show the result of the stencil testing.

Stencil Masking Result

With the FrontSide enabled it looks like the image below. The object is a bit bigger than the portal that was rendered so the rounded corners don’t show the stencil masked object behind it. The FrontSide is a backface culled card.

The BackSide object is also a backface culled quad with a different texture, but facing the other side

Iridiscence

Iridiscence is used to generate the varying colors across the surface and view direction. It contains a few variables that you can control. First of all there is a SpectrumMap texture. This is a 1 dimensional lookup texture that will be used as a lookup map for the iridescence color. I used a rainbow color texture, but it could as wel be any other fancy gradient. (See also: Improving the Rainbow) Note that this texture is sampled twice to not only create a color variation based on viewing angle, but also based on UV coordinate. The iridiscence color is added to the albedo (base color) in the fragment shader so this means that iridiscence will be most noticeable on the darkest parts of the material. is Note that the iridescence color is calculated per vertex in the MRTK Standard Shader.

Intensity is a simple scale factor for the amount of iridescence that will be added.
Threshold controls the amount of gradient falloff across the surface, a value of 0 will make it fully viewing angle dependent, a value of 1 will make if fully depend on UV coordinates.
Angle controls the direction of the gradient. A value of 0 will make it the gradient perfectly horizontal, a value -.78 will rotate it 45 degrees left and a value of .78 will rotate the gradient 45 degrees to the right.

To better show how the Iridescene Threshold and Angle influence the final result I created a small test.

MRTK Standard Shader Iridescence Threshold and Angle test setup

Viewing angle dependent character pose

I made the Timmy character inside the card change pose based on viewing angle. This was done by placing a character animation on a timeline that is manually controlled from the PlayableDirector in the character.

Finally here is the PoseByViewAngle script that is used to calculate the animation time based on the viewing angle.

using Microsoft.MixedReality.Toolkit.Utilities;
using UnityEngine;
using UnityEngine.Playables;

public class PoseByViewingAngle : MonoBehaviour
{
    [SerializeField]
    [Tooltip("The PlayableDirector that controls pose")]
    private PlayableDirector PosePlayableDirector;

    [SerializeField]
    private Transform targetTransform;

    private void Start()
    {
        if (!targetTransform)
        {
            targetTransform = CameraCache.Main.transform;
        }
    }

    protected void Update()
    {
        if (!targetTransform)
            return;

        // Get a Vector that points from the target to the main camera.
        Vector3 directionToTarget = targetTransform.position - transform.position;

        var angle = Vector3.Angle(directionToTarget, -transform.forward);

        PosePlayableDirector.time = Map(angle, 0, 90, 1.666f, .333f); 
        PosePlayableDirector.Evaluate();
    }

    public static float Map(float value, float from1, float to1, float from2, float to2)
    {
        return (value - from1) / (to1 - from1) * (to2 - from2) + from2;
    }
}

More

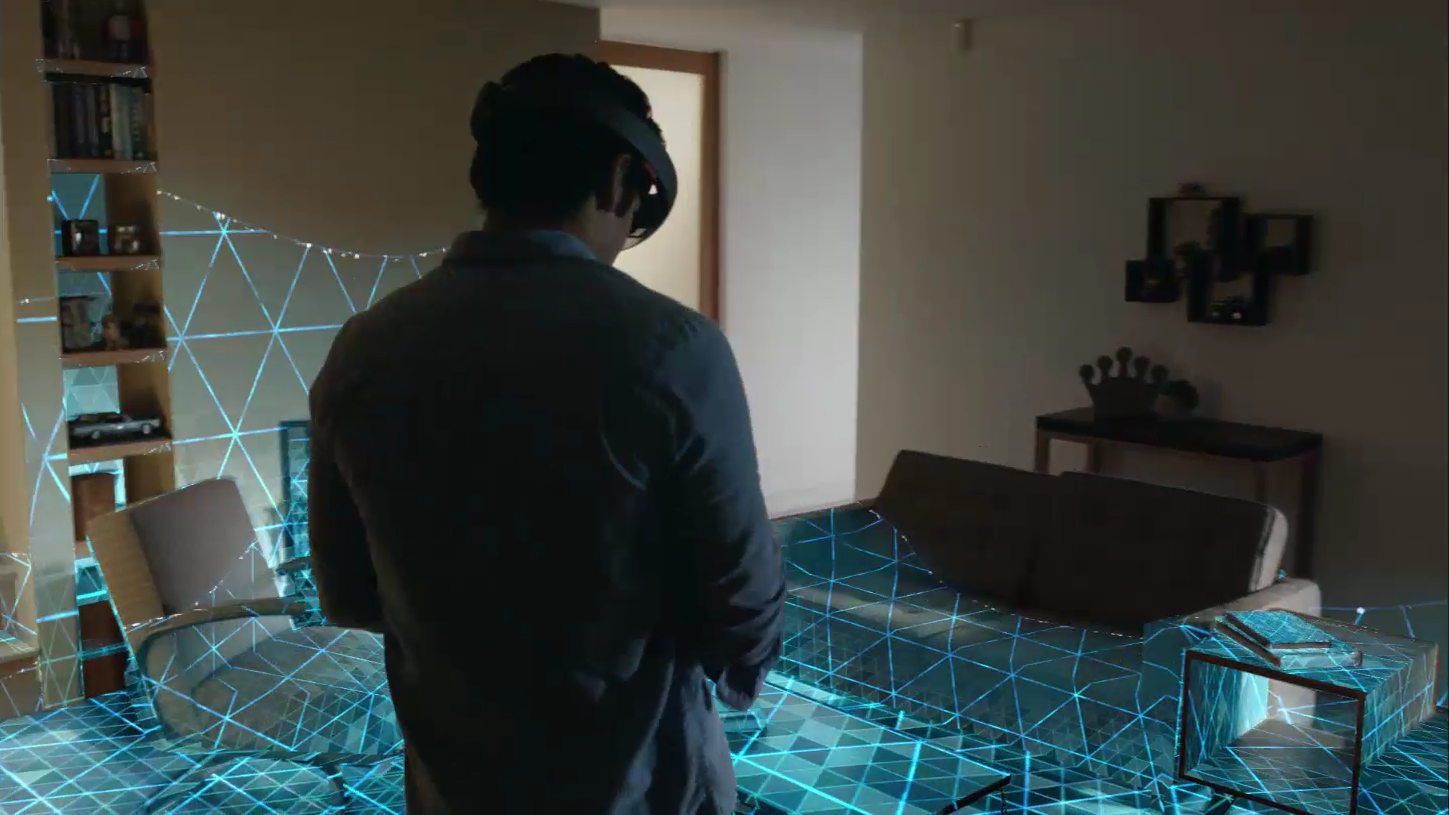
Demos to install on your HoloLens 2

So you finally laid hands on a brand new HoloLens 2, but you discovered that there are only a few apps preinstalled on the device. Most of them are holographic versions of common Windows apps like Mail, Calender, Photos or Microsoft Edge and do not justice to the capabilities of the device.

You run into the same problem in the Microsoft Store. Most apps that are available for desktops are Universal Windows apps and can technically be installed on HoloLens. This does not mean that you should.

There are apps that were specifically developed for HoloLens, but most of the apps that are currently available were developed for HoloLens 1. Furthermore a lot of HoloLens apps in the Store are developer prototypes that do not adhere to the Microsoft design guidelines all that well.

Below you will find a list of apps that were developed with HoloLens 2 in mind (mostly by Microsoft).

HoloLens Tips

A small app that introduces you to basic hand interactions by picking up a holographic flower, and scaling and rotating it. There is also a section about voice commands.

Download HoloLens Tips from the Microsoft Store

HoloLens Playground

An application that is similar to the HoloLens Tips application, but a bit more playful. It is built by Microsoft Design Labs. The most striking demo is the one where you interact with a holographic hummingbird. Reach out your hand and the hummingbird will hover above it. There’s also a piano and eye tracking demo that you can select from a hand menu.

Download HoloLens Playground from the Microsoft Store

Surfaces

Another application by Microsoft Design Labs. This one lets you play with 9 different interactive surfaces creating different visual and sound effects. There’s a hand menu that allows you to switch between the different scenes. Some interactions reminded me a bit of Magic Leap’s Tonandi although the experiments in Surfaces are of a much smaller scale.

Surfaces

Download Surfaces from the Microsoft Store
Download source code from GitHub

Mixed Reality Toolkit examples

The Mixed Reality Toolkit is the goto library for HoloLens developers. The latest iteration applies the design guidelines that Microsoft compiled for Mixed Reality applications. The examples let you familiarize with the available interactions and their visual and audio design. A prebuilt app that contains most of the examples is available from GitHub. Note that you will need to use the HoloLens Device Portal to install it on your device. For HoloLens 2 you will need to download the ARM version.

Hand Interaction Examples

Download the prebuilt app from GitHub
Download source code from GitHub

Galaxy Explorer

Galaxy Explorer is an open source project that Microsoft developed as an example for developers. The version you can download from the Microsoft Store (with female voice over) is the old version with HoloLens 1 airtap interaction.

Galaxy Explorer

The project was updated to work with hand interaction of the HoloLens 2 (male voice over), but currently you will have to build it yourself if you want to run it on your HoloLens.

Download Galaxy Explorer from Microsoft Store (HoloLens 1 version)
Download the source code from GitHub (HoloLens 2 version)

Periodic Table

Another open source application developed by Microsoft Design Labs. This app was initially developed for HoloLens 1. The design and development process was described here. Later it was ported to HoloLens 2 using the new MRTK. That migration process is described here. A prebuilt version of the app is available from GitHub, but you will need use the HoloLens Device Portal to install it.

Periodic Table of the Elements

Download prebuilt app from GitHub
Download source code from GitHub

Ford GT40

A new HoloLens 2 app developed by Microsoft Design Labs. It showcases the Ford G40 and direct hand manipulations for selecting different car features. Furthermore it demonstrates technical instructions to replace a part in the car.

Download Ford GT40 from Microsoft Store

Kippy’s Escape

Most of the HoloLens 2 apps shown above were built with Unity. Kippy’s Escape is a HoloLens 2 app built with Unreal Engine. Microsoft Design Labs built it as an example for developers so it also has the source code available. It’s a fun little game where you help Kippy the robot to reach his rocket. It has a few puzzles that you need to solve with direct hand interaction.

Download Kippy’s Escape from Microsoft Store
Download the source code from GitHub

More

Softening the HoloLens FOV border

To hide the limited Field of View of a Mixed Reality headset like the HoloLens or the Magic Leap you can fade out the holograms at the border of the view. I will discuss three possible techniques with different advantages and disadvantages.

Note that all techniques have the same visual result in the HoloLens. However when recorded with Mixed Reality Capture the border effect seems to largely fall outside of the MRC camera field of view.

Postprocessing effect

The most modern solution is applying a post-processing effect. Post-processing effects in Unity can be a heavy hit on fillrate so that is why Microsoft advises not to use them on HoloLens. The Magic Leap has a bit more graphics power to spend so it may be a viable solution on that device. Typically a post-processing effect works by rendering the scene to a texture and then rerender that texture on a screen-aligned quad with a filter effect (e.g. grayscale, bloom, vignette etc.) applied during that rerender. This can be done multiple times in succession, but since each rerender also means modifying each screen pixel this will cost you fillrate.

Post-processing a scene in Unity needs two assets to work together:

  • a script that is attached to the camera and implements OnRenderImage
  • a shader that is applied when we rerender the scene image in OnRenderImage

The biggest advantage of using this technique is that it doesn’t require changes to the content of your scene. But it may be a bit overkill for only add a fading border.

Postprocessing shader with red/green output

Postprocessing final result

BorderFadePostProcess.cs

using UnityEngine;
public class BorderFadePostProcess : MonoBehaviour
{
    [Range(0, 500)]
    public float borderWidth = 100;
    private Material material;
    void Awake()
    {
        // Creat a Material using the FadeBorder shader
        material = new Material(Shader.Find("Hidden/FadeBorder"));
    }
    // Postprocess the image
    void OnRenderImage(RenderTexture source, RenderTexture destination)
    {
        material.SetFloat("_borderWidth", borderWidth);
        
        // Rerender the scene on a screen aligned quad with the given material/shader
        Graphics.Blit(source, destination, material);
    }
}

Fadeborder.shader

Shader "Hidden/FadeBorder"
{
 Properties
 {
  _MainTex ("Texture", 2D) = "white" {}
 }
 SubShader
 {
  // No culling or depth
  Cull Off ZWrite Off ZTest Always
  Pass
  {
   CGPROGRAM
   #pragma vertex vert
   #pragma fragment frag
   
   #include "UnityCG.cginc"
   struct appdata
   {
    float4 vertex : POSITION;
    float2 uv : TEXCOORD0;
   };
   struct v2f
   {
    float2 uv : TEXCOORD0;
    float4 vertex : SV_POSITION;
   };
   v2f vert (appdata v)
   {
    v2f o;
    o.vertex = UnityObjectToClipPos(v.vertex);
    o.uv = v.uv;
    return o;
   }
   
   sampler2D _MainTex;
   
   // Width of the border in pixels
   fixed _borderWidth;
   float linearStep(float a, float b, float t)
   {
    return saturate((t - a) / (b - a));
   }
   fixed4 frag (v2f i) : SV_Target
   {
    fixed4 col = tex2D(_MainTex, i.uv);
    // Distance to border along x and y
    float2 distanceInPixels = (0.5 - abs(i.uv.xy - 0.5)) * _ScreenParams.xy;
    // Linear border fade
    float mask = linearStep(0, _borderWidth, min(distanceInPixels.x, distanceInPixels.y));
    //return col + lerp(fixed4(1, 0, 0, 1), fixed4(0, 1, 0, 1), mask);
    // Return masked color
    return col * mask;
   }
   ENDCG
  }
 }
}

Fading materials

Another solution is to let the material/shader do the fading out. The used shader needs to calculate the screen position and then fade out the material when at the edge of the screen. Each hologram in the scene needs to have a material applied with this edge fading in it’s shader.
Modifying the used shaders may result in an improved performance, but this highly depends on what is visible in your scene. No separate postprocessing render is needed, but each shader uses a few more instructions and it requires all shaders in your scene to be modified.

Material fade with red/green output

Material fade final result

See GitHub project link for the source code of the Standard_BorderFade shader. It’s a modification of the Standard shader from the Holotoolkit.

Screenspace border

The third solution is rendering a screen aligned border that fades from transparent block to opaque black. It may sound a bit old skool, but it does the job with minimal performance impact and no need to modify the content of your scene.


Screenspace border with red/green output

Screenspace border final result

Borderdrawer.cs

using UnityEngine;
public class BorderDrawer : MonoBehaviour
{
    [Range(0, 500)]
    public float borderWidth = 100;
    private Material material;
    private Color OutsideColor = new Color(0, 0, 0, 1);
    private Color InsideColor = new Color(0, 0, 0, 0);
    private void Start()
    {
        // Creat a Material using the FadeBorder shader
        material = new Material(Shader.Find("Unlit/VertexColor"));
    }

    void OnPostRender()
    {
        // HoloLens resolution 1280 x 720 
        // HoloLens screen/safe area 1268 x 720
        float left = (float)borderWidth / (float)Screen.width;
        float bottom = (float)borderWidth / (float)Screen.height;
        float right = 1 - left;
        float top = 1 - bottom;
        GL.PushMatrix();
        material.SetPass(0);
        GL.LoadOrtho();
        GL.Begin(GL.TRIANGLE_STRIP);
        GL.Color(OutsideColor);
        GL.Vertex3(0.0F, 0.0F, 0);
        GL.Color(InsideColor);
        GL.Vertex3(left, bottom, 0);
        GL.Color(OutsideColor);
        GL.Vertex3(1F, 0F, 0);
        GL.Color(InsideColor);
        GL.Vertex3(right, bottom, 0);
        GL.Color(OutsideColor);
        GL.Vertex3(1F, 1F, 0);
        GL.Color(InsideColor);
        GL.Vertex3(right, top, 0);
        GL.Color(OutsideColor);
        GL.Vertex3(0F, 1F, 0);
        GL.Color(InsideColor);
        GL.Vertex3(left, top, 0);
        GL.Color(OutsideColor);
        GL.Vertex3(0F, 0F, 0);
        GL.Color(InsideColor);
        GL.Vertex3(left, bottom, 0);
        GL.End();
        GL.PopMatrix();
    }
}

Github

The source code for these three techniques is available from this Github repository

References

More

HoloLens scanning effect in Unity

In a previous blog post I talked about my attempt to rebuild the HoloLens scanning effect as shown in this video. After following the HoloLens Academy tutorials I decided to see how easy my existing shader could be integrated in Unity. It turned out that only a minimal amount of plumbing was needed.

HoloLens room scan

I took the project files from the HoloLens course on spatial mapping (Holograms 230). That course explains how you can apply your own material and a custom shader to the mesh that is generated by the spatial mapper. For quick iterations you can even load a previously saved room mesh. I added a new unlit shader and a material using it. This material is used by the Spatial Mapping Manager script to apply to the mesh coming from the spatial mapper.

Unity shader variables

Most of the plumbing came down to defining variables and using them in the shader. The main animation is driven by the global time. Unity provides this as a built-in variable vector _Time, where the y-component contains the elapsed time in seconds. I added a few variables to control the looks and behavior of the effect like Main Color, Speed, Triangles Scale and Range Scale.

The center of the effect is also a variable that can be configured. It could be updated by using doing a Raycast intersection as explained in the HoloLens Academy tutorials. Currently the effect keeps pulsating every 5 seconds. To only trigger the effect on an event the used global time could be replaced by a separately controlled progress variable.

Differences with original effect

To create the effect of triangles walking across the floor and up the walls the shader needs to calculate uv coordinates based on a world location. Preferably with as little seams as possible. I used the horizontal distance to the configured center point and added the vertical distance instead of using the direct distance to the center point. This works reasonably well on connected surfaces, but note that it is not a real walk across the topology of the mesh.

The effect in the original video has a slightly different border effect that has some more distortions and a different color. I experimented with mimicking that effect, but decided to leave that out. I used the effect in an interactive installation where I preferred a stronger border that looked like a wave was expanding outwards.

The source code of the project is available on Github.

HoloLens Shader Pack

A new version of this shader was optimized for running on the actual HoloLens device. This shader and many others are available in the HoloLens Shader Pack that is available on the Unity Asset Store.
More